- Your cart is empty
- Continue Shopping
What is the Correct Downstem and Joint Size
Previous pageWhat is the Correct Downstem and Joint Size?
Today were going to show you how to chose the correct downstem and joint size. Downstems are that fragile part of your setup that reaches into the pipe and creates the all-too-important airflow into water needed for a water pipe to do its thing. Unfortunately, downstems can break. No need to fear though. We are going to show you how to find the correct downstem and joint size When your device takes a spill and needs a new part, we’re here to help you find the size and length of the downstem with a few simple steps.
Here is how downstems work. First, you need to understand the ground joint sizing. Ground joints are used in a set, consisting of the male inner piece (with a conical end, ground on the outside) and the female outer piece (ground on the inside to the corresponding dimensions). Their measurements are in millimeters.
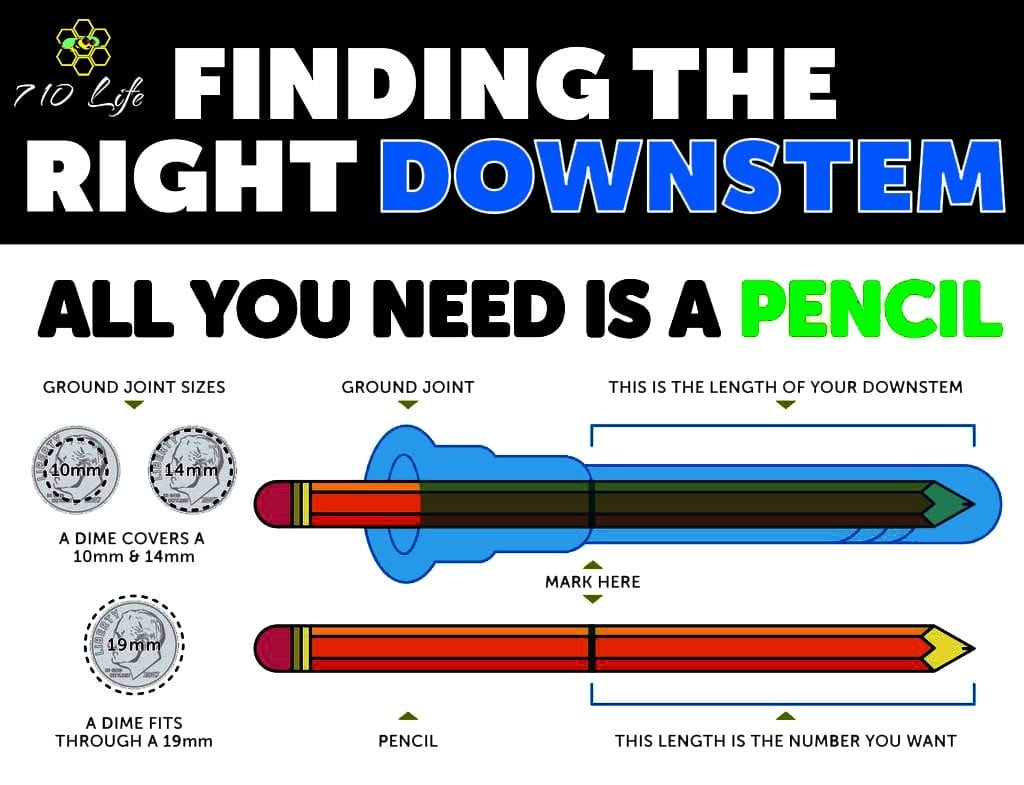
Ideally, you will want to find a ruler. If you don’t have one, then a new pencil is about 7 inches or 200mm. A dime is about 19mm wide. You’ll need a pencil and a dime. Look in your couch cushions for either. Take the old downstem of your water pipe and set is aside for now.
If you can place a dime over the female ground joint of your device and it doesn’t slide inside, then it is a 14mm ground joint. If it can slide inside the hole, then it is an 18mm or 19mm joint. Also if you can’t slide a pencil into the hole, then it is a 10mm joint.
Once you have the downstem size you need the length. Slide a pencil into the female ground joint of your pipe and make a mark on the pencil the depth of the downstem. This is the entire length of the downstem, but downstems lengths are given without the length of the joint. The ground joint is usually about one inch long, so subtract that from the pencil mark length. What remains is your downstem length. It may sound complicated, but we promise it’s not hard to find the correct downstem and joint size!

