- Your cart is empty
- Continue Shopping
Setting up the 710 Life Micro eNail
- Cannabis Info, Enails, Vaping
- Posted on
-
 by
BossHog
by
BossHog
You’ve done your enail research and found the best, got all those customizable features selected to craft the perfect dab rig, and finally made the leap: you’re finally the owner of a brand spanking new 710 Life Micro eNail kit.
Here’s what’s included:
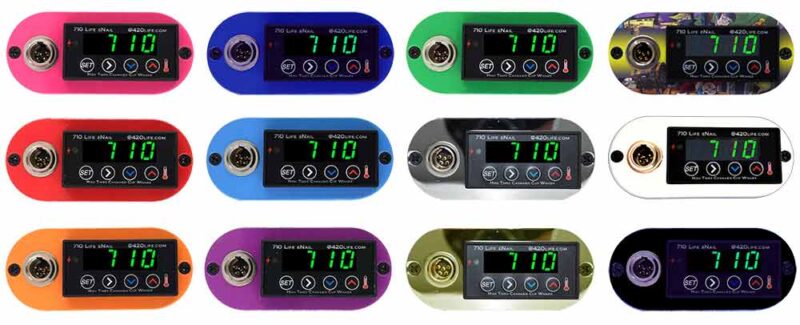
- 710 Life Micro eNail Controller. Lightweight and tiny enough to fit in the palm of your hand, this will be your temperature control box that heats your dab rig with the utmost precision.
- Heating Element. This will be the heating coil that’ll get your device nice and toasty – the range goes from room temperature of 65F° all the way up to 1000 F°– we recommend keeping it between 400-600F°.
- AC Power Cord. For all your charging needs.
- Nail Accessory. Whether you prefer the durability of titanium or the speed of quick heating quartz – all of our micro nails come with adapters for both male and female rigs.
- Carb Cap & Dabber. Yours for the scooping and the heat-trapping.
Now that you’ve got all your ducks – and accessories – in a row, you’re ready to set up your 710 Life Micro eNail kit and get to dabbing. So grab your favorite sauce, get cozy, and read on for 710 Life Micro eNail set-up 101, tips and tricks, temperature how-to’s, and more.
Setting up Your 710 Life Micro eNail: Let’s Get in Formatio
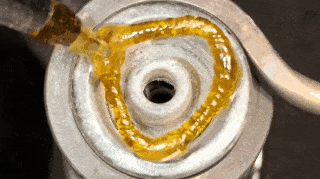
- Choose your adapter, attach your coil, and install onto your water pipe. Connect your nail accessory to your heating element, paying attention to whether you’re using a male or female adapter piece. Ready to slide the bowl piece of the nail through the heating element. \Make sure that your heating element and your nail are both attached securely to each other as well as to the water pipe!
- Connect your heater coil with the controller unit. Attach your heating element to the 710 Life Micro eNail controller by plugging in the connector on the element into the port on the back panel of the controller. Double-check that your 710 Life Micro eNail is still powered off at this point to make sure power is only applied when expected. Your nail and coil are about to get super hot – so make sure there’s nothing touching either before you start.
- Power on the control unit. Last but not least, after connecting your power cord to your controller – plug it into an outlet. Your electric dab rig is ready to rumble. Using Your 710 Life Micro eNail For The First Time: It’s Getting Hot in Here
Now that you’re all set up, let’s talk temperature. Before you get started, knowing how to adjust to your set temperature will make your dabbing experience a bit more seamless.
On your 710 Life Micro eNail, you’ll see one up and one down button: the current temperature on the display will start flashing to show you the desired set temperature instead. You get about 5 seconds to adjust the temperature to exactly where you’d like it.
Once you see your set temperature flash – hands off! Don’t press any more buttons for 5 more seconds as the display stops flashing and goes back to the current temperature.
Pro-tip: for all the terp lovers out there, try experimenting with cold-start dabs. For these, instead of pre-heating your 710 Life Micro eNail, load your concentrate onto your nail first – and then start heating. Since the temperatures will be lower, you’ll actually preserve certain cannabinoids that would otherwise burn off on a higher setting. With a cold-start (or reverse) dab, you’ll get a boost in flavor and actually reduce residual buildup and potential for breakage.
Powering Your 710 Life Micro eNail On/Off: Let’s Get It On (and Off)
Keep in mind that powering on your 710 Life Micro eNail takes about 3 minutes – depending, of course, on the set temperature. When you move the switch to the ON position, the LED display will show a negative number that will then start to rise, and you’ll notice the flashing HEAT LED. Take this time to adjust your temperature, and once that’s reached, the Initial Power On mode is over and your 710 Life Micro eNail is ready to go.
When you power off your 710 Life Micro eNail, all you have to do is switch the position to OFF – just remember that the entire Power Down takes up to 10 minutes. Once the coil reaches room temperature, the 710 Life Micro eNail is completely off (be patient, and don’t test this with your fingertips!).
Some Final Words of Wisdom
Good news: you’re ready to get dabbing and your 710 Life Micro eNail is calling your name.
Before we let you go – whether it’s your first (or hundredth) day using your 710 Life Micro eNail – we’ll leave you with a few parting tips and tricks that’ll make for a smoother (no pun intended) dabbing experience.
- Save power by leaving your 710 Life Micro eNail on from the start of your day’s dab to the end instead of going through multiple on and off cycles. With the same wattage as a household light bulb, you don’t have to worry about leaving it on all-day
- Don’t forget to take off the carb cap after your dab: leaving it on will cause concentrate to burn and make your nail more difficult to clean. It’ll also make it really hot if you don’t take it off right away!
- Speaking of cleaning, invest in having Q-tips on hand to swab your nail after each dab.
And, finally, for a more in-depth and visualized tutorial to have on hand, 710 Life eNail Instruction Manual Download and Detailed instructions including nails.
Happy dabbing!